Halloween Crafts for Kids: 30 Easy Step-by-Step Projects by Age
- Match the craft to the age: stamping and stickers for toddlers, gluing and painting at 3 to 5, cutting and building from 5 up.
- Most projects use recycling-bin materials and take 15 to 30 minutes; no-dry crafts work best for classrooms and parties.
- No small parts for children under 3, LED lights only, and hot glue, blades and pumpkin carving stay with adults.
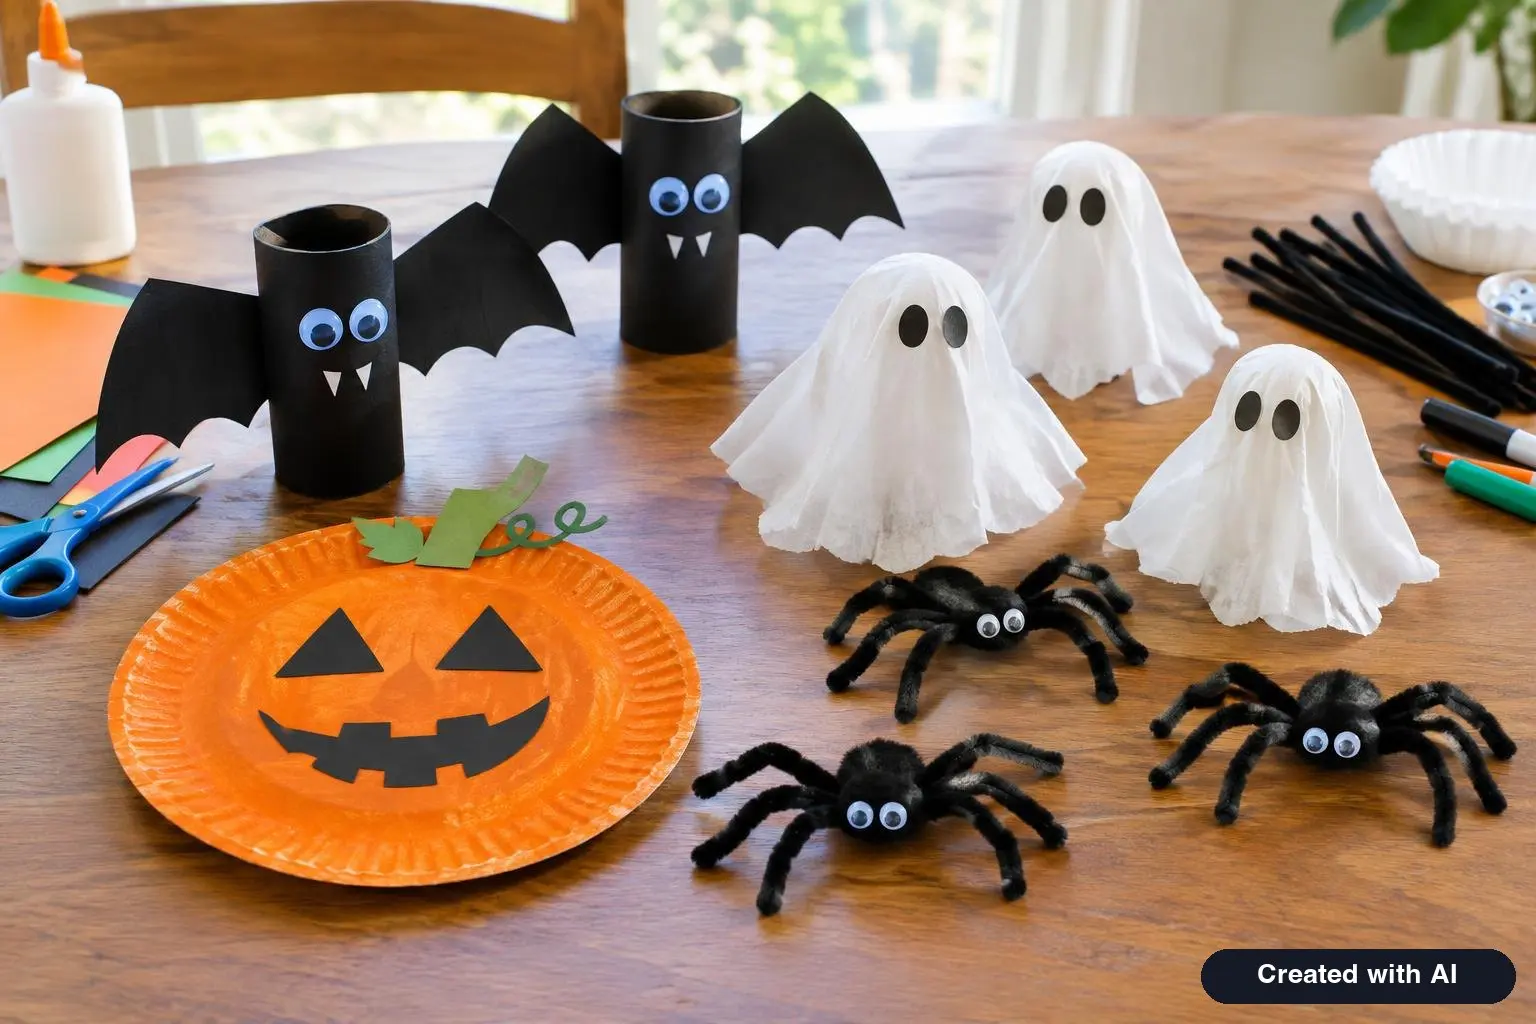
- Halloween Crafts by Age: What Kids Can Do
- Craft Supplies to Have on Hand
- Craft Safety for Kids
- Halloween Crafts for Toddlers (Ages 1–3)
- Halloween Crafts for Preschoolers (Ages 3–5)
- Halloween Crafts for Ages 5–8
- Halloween Crafts for Ages 9–12
- Quick Reference: All 30 Crafts
- Crafts for Classrooms and Halloween Parties
- What to Do With Finished Crafts
The best Halloween crafts for kids match the child's age: toddlers stamp and stick, preschoolers glue and paint, early elementary kids cut and assemble, and children 9 and up can handle sewing, wire and multi-step builds. Below are 30 crafts with materials and numbered steps, sorted by age, plus a supply list built mostly from the recycling bin, safety rules and tips for running crafts in a classroom or at a party. Most take 15 to 30 minutes and cost almost nothing.
Halloween Crafts by Age: What Kids Can Do
| Age | What they can do | Good craft types | Adult's job |
|---|---|---|---|
| 1–3 (toddlers) | Stamp, smear, stick, tear paper | Handprints, sticker pumpkins, contact-paper collages | Prep everything; stay within arm's reach; no small parts |
| 3–5 (preschool) | Paint, glue, snip with safety scissors, thread large beads | Paper plates, coffee filters, cotton balls, toilet-paper rolls | Pre-cut tricky shapes; manage the glue |
| 5–8 (K–2nd grade) | Cut on a line, fold, tape, follow three or four steps | Paper chains, masks, pipe-cleaner creatures, lanterns | Demonstrate once, then step back |
| 9–12 | Measure, sew simple stitches, use a low-temperature glue gun with supervision | Papier-mâché, sock creatures, string art, dioramas | Supervise heat and blades |
| Teens | Plan and finish a project alone | Costume props, room decor, shaved pumpkin designs | Supply materials and stay out of the way |
Craft Supplies to Have on Hand
| From the recycling bin | From the craft drawer | Worth buying |
|---|---|---|
| Toilet-paper and paper-towel rolls | Construction paper: black, orange, white, purple, green | Googly eyes in mixed sizes (ages 3 and up) |
| Egg cartons | Washable tempera paint and brushes | Black and orange pipe cleaners |
| Glass jars and tin cans | White school glue and glue sticks | Battery-operated tea lights |
| Milk jugs | Safety scissors | White coffee filters |
| Cardboard boxes | Markers and crayons | Paper plates and lunch bags |
| Old socks and T-shirts | Tape, string, yarn | Tissue paper in orange, white and black |
| Newspaper | Cotton balls | Craft sticks and wooden clothespins |
Craft Safety for Kids
- Under 3: no small parts. Federal rules ban small parts in products intended for children under 3 because they are a choking hazard. Apply the same standard at the craft table: no googly eyes, beads, buttons, pom-poms or pieces of balloon. Draw the eyes on instead.
- Check art-supply labels. Art materials sold in the United States are evaluated under the standard ASTM D-4236 and say so on the label. For young children, look for the AP (Approved Product) seal of the Art and Creative Materials Institute, which marks products certified non-toxic.
- Craft paint is not face paint. Use only cosmetics made for skin on faces and hands that will go near mouths. The FDA advises testing any Halloween makeup on a small patch of skin first; for handprint crafts, use washable paint and wash hands right afterward.
- Batteries and lights. Use LED tea lights, never candles, in anything a child makes. Tape battery compartments shut for young children. If a child swallows a button battery, call the National Battery Ingestion Hotline at 1-800-498-8666 or Poison Control at 1-800-222-1222 immediately.
- Heat and blades are adult tools. Hot glue, craft knives, drills and ovens belong to the grown-up. Under about age 9, an adult does the hot gluing.
- Adults carve pumpkins. The American Academy of Pediatrics recommends that small children decorate pumpkins with markers and help scoop, not carve.
- Cover up. An old adult T-shirt worn backward is a full-length smock. Newspaper on the table saves cleanup.
Halloween Crafts for Toddlers (Ages 1–3)
Keep sessions to 10 or 15 minutes, do one child-led step, and expect the result to look like a toddler made it.
1. Handprint ghosts
Materials: black paper, white washable paint, black marker.
- Brush white paint on the child's palm and fingers.
- Press the hand onto black paper with the fingers pointing down.
- When dry, draw two eyes and a mouth on the palm. The fingers are the ghost's tail.
2. Footprint ghost family
Materials: black paper, white paint, marker.
- Paint the sole of the foot white and press it onto the paper, heel at the top.
- Repeat with siblings' or parents' feet for a family.
- Add faces on the heels and write the year.
3. Sticker pumpkin
Materials: a small real pumpkin or an orange paper circle, black stickers or foam shapes.
- Peel the edge of each sticker to give small fingers a start.
- Let the child place eyes, nose and mouth wherever they like.
4. Contact-paper sun catcher
Materials: clear contact paper, torn orange tissue paper, a pumpkin frame cut from black paper.
- Tape a sheet of contact paper to the table sticky side up and lay the frame on it.
- Let the child press tissue pieces onto the sticky center.
- Seal with a second sheet, trim and tape to a window.
5. Apple-stamp pumpkins
Materials: an apple cut in half, orange paint on a plate, paper, green crayon.
- Dip the cut side in paint and stamp across the paper.
- When dry, draw green stems and vines to make a pumpkin patch.
6. Cotton-ball ghost
Materials: ghost shape cut from cardstock, glue, cotton balls, marker.
- Spread glue over the shape (an adult does this for the youngest).
- The child presses on cotton balls until the ghost is covered.
- Draw the face on a bare spot left for it.
7. Fingerprint spider web
Materials: white paper with a web drawn in marker, black ink pad or paint.
- The child presses black fingerprints anywhere on the web.
- An adult adds eight thin legs to each print with a pen.
Halloween Crafts for Preschoolers (Ages 3–5)
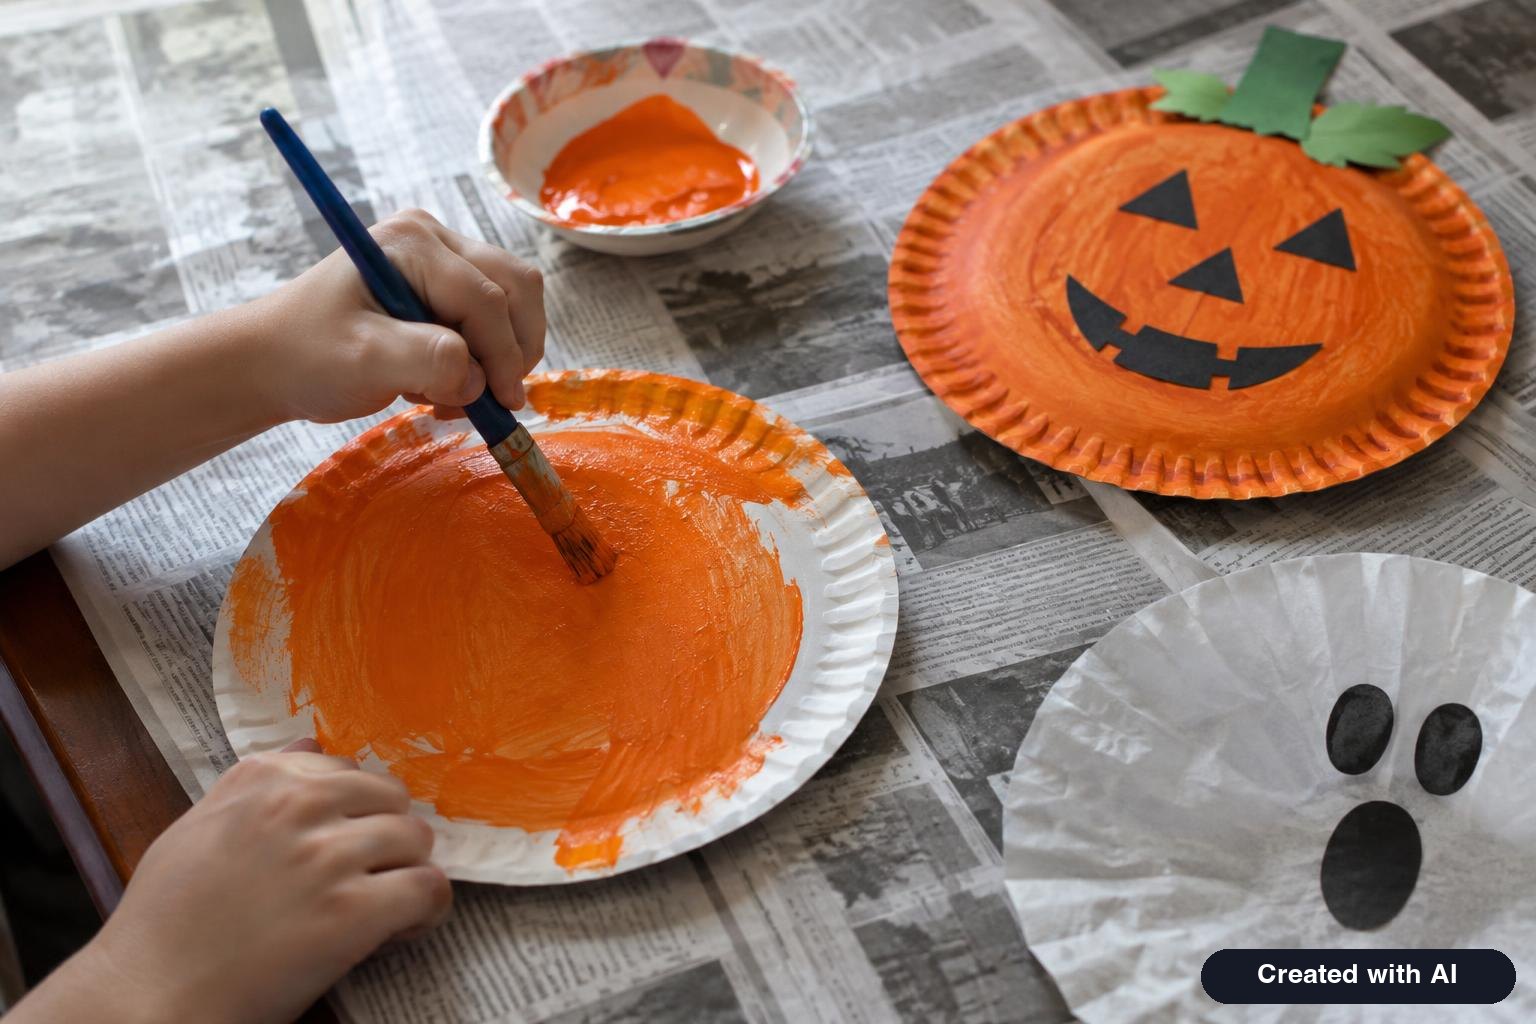
8. Paper-plate pumpkin
Materials: paper plate, orange paint, black and green paper, glue.
- Paint the plate orange and let it dry.
- Glue on black triangle eyes, a nose and a mouth.
- Add a green paper stem and a curled paper vine at the top.
9. Toilet-roll bats
Materials: cardboard tube, black paint or paper, black cardstock, googly eyes.
- Paint or wrap the tube in black.
- Press the top edges inward from both sides to form two pointed ears.
- Glue scalloped wings to the back and eyes to the front. Add white paper fangs.
10. Coffee-filter ghosts
Materials: two coffee filters, a cotton ball or lollipop, string, marker.
- Place the cotton ball (or lollipop) in the center of a flat filter and lay a second filter on top.
- Gather both around the ball and tie with string.
- Draw eyes and hang several from a branch or a doorway.
11. Paper-plate spider
Materials: small paper plate, black paint, eight strips of black paper, googly eyes, yarn.
- Paint the plate black.
- Fold each strip accordion-style and glue four to each side.
- Add eyes and tape yarn to the back so the spider bounces.
12. Paper-bag monster puppets
Materials: paper lunch bag, construction paper, glue, markers.
- Keep the bag folded flat; the bottom flap is the mouth.
- Glue eyes (one, three or five) above the flap and teeth under its edge.
- Add horns, hair and arms, then put a hand inside and make it talk.
13. Candy-corn collage
Materials: white paper triangle with two pencil lines, torn yellow, orange and white paper, glue stick.
- Tear the colored paper into small pieces. Tearing builds finger strength.
- Glue yellow pieces in the wide bottom band, orange in the middle and white at the tip.
14. Fork-print monsters
Materials: plastic fork, paint, paper, googly eyes.
- Press the back of the fork in paint and stamp it in a circle, tines outward, to make a furry ball.
- Add eyes while the paint is wet and draw legs and a mouth when dry.
15. Cotton-swab skeleton
Materials: black paper, cotton swabs (some cut in half by an adult), glue, a white paper skull.
- Glue the skull near the top of the page.
- Lay out whole swabs for the spine, arms and legs and half swabs for ribs, fingers and toes.
- Glue each one down. It doubles as a first anatomy lesson.
Halloween Crafts for Ages 5–8
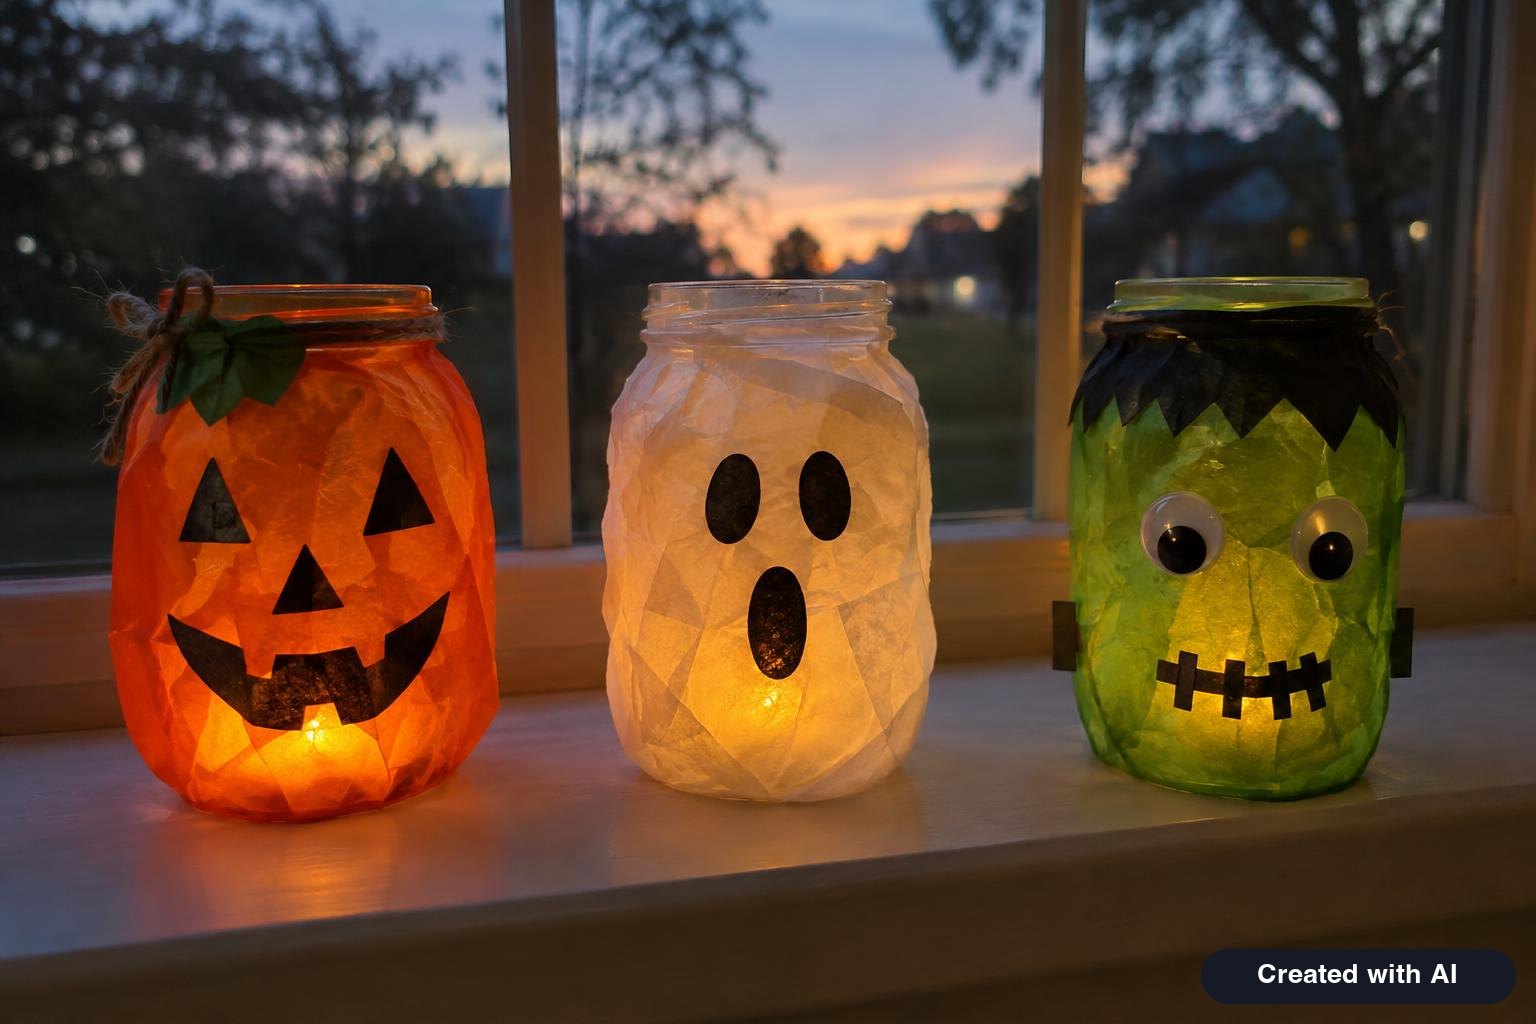
16. Mason-jar lanterns
Materials: clean jar, tissue paper, white glue thinned with water, black paper, LED tea light.
- Brush glue on the jar and cover it with overlapping tissue squares: orange for a pumpkin, white for a ghost, green for a monster.
- Brush another coat of glue over the top.
- Glue on a black paper face, let dry and drop in the light.
17. Egg-carton bats
Materials: cardboard egg carton, black paint, googly eyes, string.
- Cut a strip of three cups. Trim a notch from the bottom edge of the two outer cups to shape the wings.
- Paint black and let dry.
- Glue eyes to the middle cup and hang by a string.
18. Pipe-cleaner spiders
Materials: four black pipe cleaners, one large pom-pom or bead, googly eyes.
- Hold the four pipe cleaners together and twist them tightly at the center.
- Spread the eight ends and bend each down, then up at the tip, for jointed legs.
- Glue the pom-pom on the twist and add eyes.
19. Paper-chain garland
Materials: orange, black and purple paper cut in 1-by-8-inch strips, stapler or glue stick.
- Loop one strip and fasten it.
- Thread the next strip through and fasten. Repeat in a color pattern.
- Make it a countdown: one link per day until October 31, torn off each morning.
20. Yarn-wrapped mummy
Materials: cardboard cut in a gingerbread-person shape, white yarn, tape, googly eyes.
- Tape the end of the yarn to the back.
- Wrap in every direction until the cardboard barely shows.
- Tuck in the end and glue the eyes peeking out between strands.
21. Paper-plate masks
Materials: paper plate, craft stick, paint, paper scraps, tape.
- An adult cuts two eye holes.
- Paint and decorate as a cat, owl, pumpkin or monster with paper ears, feathers or teeth.
- Tape a craft stick to the bottom as a handle, which is more comfortable than elastic and easy to lower.
22. Lollipop ghosts
Materials: round lollipops, white tissues or fabric squares, ribbon, marker.
- Drape two tissues over the lollipop.
- Tie ribbon under the candy.
- Draw a face. A bowl of these makes a good class treat or party favor.
23. Tin-can luminaries
Materials: clean can with no sharp edges on the rim (an adult checks and tapes it if needed), filled with water and frozen solid; a towel, hammer and nail, LED tea light.
- The child draws a simple dot design on paper and tapes it around the frozen can.
- With the can resting on a folded towel, an adult steadies it while the child taps the nail through each dot. The ice keeps the can from denting.
- Melt out the ice, dry and add the light.
24. Clothespin bats and ghosts
Materials: wooden clothespins, black and white paint, cardstock wings, glue.
- Paint the clothespins and let dry.
- Glue paper wings or a ghost body across the back.
- Add a face and clip them to curtains, lampshades and bag handles.
Halloween Crafts for Ages 9–12
25. Papier-mâché pumpkin
Materials: balloon, newspaper strips, paste of one part flour to two parts water, string, orange paint.
- Inflate the balloon and tie string around it in several directions to create ribs.
- Dip strips in paste, wipe off the excess and cover the balloon in three layers, letting each dry.
- Pop the balloon, paint and add a twisted-paper stem. Allow two to three days in total.
26. No-sew sock pumpkins
Materials: orange sock, rice or dried beans, rubber bands, twine, a stick.
- Fill the foot of the sock with rice to make a ball and band it shut.
- Fold the cuff back over the ball or trim it.
- Wrap twine around the ball in sections, pulling tight to make ribs, and tuck a small stick in the top as a stem.
27. Spider-web string art
Materials: wood scrap or thick cork board, small nails or pushpins, white embroidery floss.
- Mark a center point and eight points around the edge; hammer a nail at each.
- Tie the floss to the center nail and run it out to each edge nail and back for the spokes.
- Spiral outward, looping once around each spoke. Add a plastic spider.
28. Shoebox haunted house
Materials: shoebox, black paper, craft knife (adult), tracing paper or yellow tissue, LED lights.
- Stand the box on end and cover it with black paper.
- An adult cuts windows and a door; the child tapes tissue behind them.
- Add a paper roof, a bare paper tree and silhouettes in the windows, then put the lights inside.
29. Painted rock monsters
Materials: smooth rocks, acrylic paint, paint pens, clear sealer.
- Wash and dry the rocks.
- Paint a base color, let dry and add faces with paint pens: pumpkins, mummies, one-eyed monsters.
- Seal and hide them along a walking route for neighbors to find.
30. Felt bat garland with a running stitch
Materials: black felt, embroidery needle and floss, stuffing, ribbon.
- Cut two identical bats per piece from a paper template.
- Sew around the edge with a simple running stitch, leaving a gap; stuff lightly and stitch closed.
- Sew or tie each bat to a ribbon. A good first sewing project.
Older kids and teens who want a bigger challenge can move on to the etched and drilled designs in our pumpkin carving ideas, with an adult handling the tools, or build props for the yard from our Halloween decorations guide.
Quick Reference: All 30 Crafts
| Craft | Age | Active time | Mess level |
|---|---|---|---|
| Handprint and footprint ghosts | 1+ | 10 min | High (paint) |
| Sticker pumpkin, contact-paper sun catcher | 1+ | 10 min | None |
| Apple stamps, fingerprint web, cotton-ball ghost | 2+ | 10–15 min | Medium |
| Paper-plate pumpkin and spider | 3+ | 20 min plus drying | Medium |
| Toilet-roll bats, bag puppets, coffee-filter ghosts | 3+ | 15–20 min | Low |
| Candy-corn collage, fork monsters, cotton-swab skeleton | 3+ | 15 min | Low to medium |
| Jar lanterns, egg-carton bats, clothespin bats | 5+ | 20–30 min plus drying | Medium |
| Pipe-cleaner spiders, paper chains, yarn mummy, lollipop ghosts | 5+ | 10–20 min | None |
| Paper-plate masks, tin-can luminaries | 5+ | 30 min | Low |
| Papier-mâché pumpkin | 9+ | 1 hour over 2–3 days | High |
| Sock pumpkins, string art, rock monsters, felt bats, shoebox house | 9+ | 30–60 min | Low to medium |
Crafts for Classrooms and Halloween Parties
Crafting with twenty children is a logistics problem. These rules keep it under control.
- Choose no-dry crafts. Anything that needs paint to dry cannot go home the same day. Paper chains, pipe-cleaner spiders, bag puppets, lollipop ghosts and sticker pumpkins leave with the child.
- Kit it in advance. Put each child's pieces in a paper bag or on a paper plate with their name on it. Pre-cut anything that takes more than a minute.
- Make a finished sample and a half-finished one, so children can see the step in between.
- Plan 15 to 20 minutes for kindergarten through second grade and up to 30 for older grades, and have a coloring page ready for early finishers.
- Use glue sticks, not bottles, and one adult per six to eight children under 6.
- Check for allergies before using food items such as candy, flour paste or cereal. Many schools restrict food in classrooms altogether.
- Keep themes friendly. Pumpkins, bats, owls, spiders and smiling ghosts work for every family; if your school avoids Halloween, the same crafts become "fall" crafts with leaves, scarecrows and apples.
At a home party, set up a craft table as the arrival activity so early guests have something to do while others trickle in; decorating a treat bag is ideal because every child then uses it. Games, schedules and menus are in our Halloween party ideas and Halloween food ideas.
What to Do With Finished Crafts
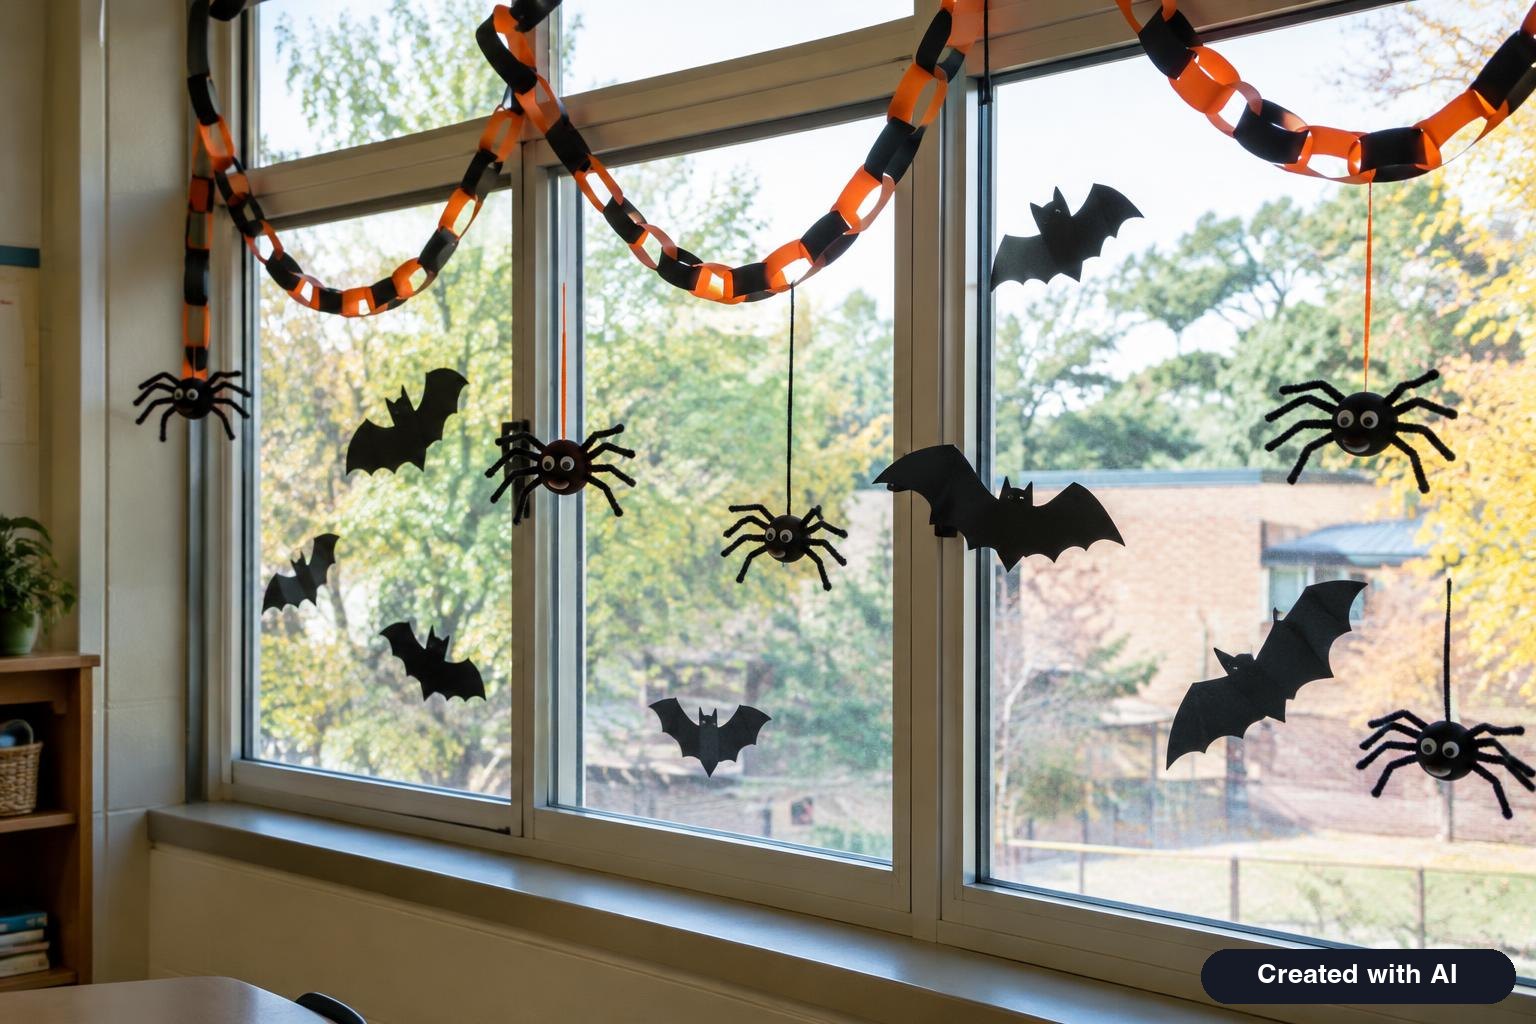
- Decorate with them. String garlands across the mantel, line lanterns along a windowsill and hang the bats in the entryway. Children notice when their work is the real decor.
- Give them away. Handprint ghosts with the date make keepsakes for grandparents. Add a line from our Halloween wishes, or design a matching card in the free card maker.
- Use them on Halloween night. Jar lanterns light the porch, masks complete a costume and lollipop ghosts go in the treat bowl.
- Save one per year. Write the child's name and the year on the back and keep a single piece; a decade of handprint ghosts is worth the drawer space.
For everything else about the day, including the date, history and a planning timeline, see our Halloween 2026 guide.
Frequently asked questions
What are easy Halloween crafts for kids?
Paper-plate pumpkins, toilet-roll bats, coffee-filter ghosts, pipe-cleaner spiders, paper-chain garlands and paper-bag monster puppets. Each needs only paper, glue, markers and a few household items, and most children aged 4 and up can finish them in 15 to 20 minutes with little help.
What Halloween crafts can toddlers do?
Handprint and footprint ghosts, sticker faces on a small pumpkin, apple-stamp pumpkins, cotton-ball ghosts and contact-paper sun catchers. Keep it to one or two steps, prepare the pieces in advance, and avoid googly eyes, beads and other small parts for children under 3.
What can I make for Halloween with toilet paper rolls?
Bats (paint black, pinch the top into ears, add paper wings), mummies wrapped in white yarn or gauze, ghosts painted white with drawn faces, small monsters with paper teeth and horns, and treat holders made by folding the ends shut and decorating the tube.
What Halloween crafts work for a classroom party?
Crafts that need no drying time and little cutting: paper chains, pipe-cleaner spiders, paper-bag puppets, lollipop ghosts, sticker pumpkins and decorated treat bags. Prepare a kit for each child, show a finished sample and allow 15 to 20 minutes.
What Halloween crafts are good for 10-year-olds?
Projects with several steps and real materials: papier-mâché pumpkins, no-sew sock pumpkins, spider-web string art, a shoebox haunted house with lights, painted rock monsters and a stitched felt bat garland. An adult should handle craft knives and hot glue.
Are craft supplies safe for young children?
Choose materials labeled as conforming to ASTM D-4236 and, for young children, carrying the AP non-toxic seal. Keep small parts away from children under 3, use washable paint, never use craft paint as face paint, and secure button batteries in LED lights.
How do you make a ghost craft?
The quickest is a coffee-filter ghost: put a cotton ball in the center of one filter, lay a second on top, gather them around the ball, tie with string and draw two eyes. For toddlers, press a white-painted hand onto black paper with fingers pointing down and draw a face on the palm.
What can kids make instead of carving a pumpkin?
They can paint a pumpkin, draw a face in marker, cover it in stickers, wrap it as a mummy or add pipe-cleaner spider legs. Paper-plate pumpkins, papier-mâché pumpkins and sock pumpkins last longer than a real one and need no knife at all.
Sources
- CPSC: Small parts ban and choking hazard labeling
- Art and Creative Materials Institute: Regulations (ASTM D-4236)
- FDA: Halloween safety tips for costumes, candy and colored contact lenses
- National Capital Poison Center: Swallowed a button battery?
- American Academy of Pediatrics (HealthyChildren.org): Halloween fun and safety tips
- U.S. Consumer Product Safety Commission: Halloween safety tips and injury estimates
Log in to comment
No comments yet. Be the first.