Pumpkin Carving Ideas: 45 Designs, Stencils and How-To Steps
- Pick a heavy pumpkin with one to two inches of stem and no soft spots, and never carry it by the stem.
- Thin the wall to about an inch, transfer a stencil with pin pricks and saw from the center of the design outward.
- A 10 percent bleach rinse, petroleum jelly on the cuts and temperatures of 50 to 60°F keep a jack-o'-lantern going longest.
- How to Pick a Pumpkin for Carving
- Pumpkin Carving Tools
- How to Carve a Pumpkin: Step by Step
- Pumpkin Carving Stencils and Patterns: How to Use Them
- 45 Pumpkin Carving Ideas by Difficulty
- No-Carve Pumpkin Ideas
- Pumpkin Carving Safety
- How to Keep a Carved Pumpkin Fresh
- What to Do With Pumpkin Seeds and Flesh
- Pumpkin Facts for the Carving Table
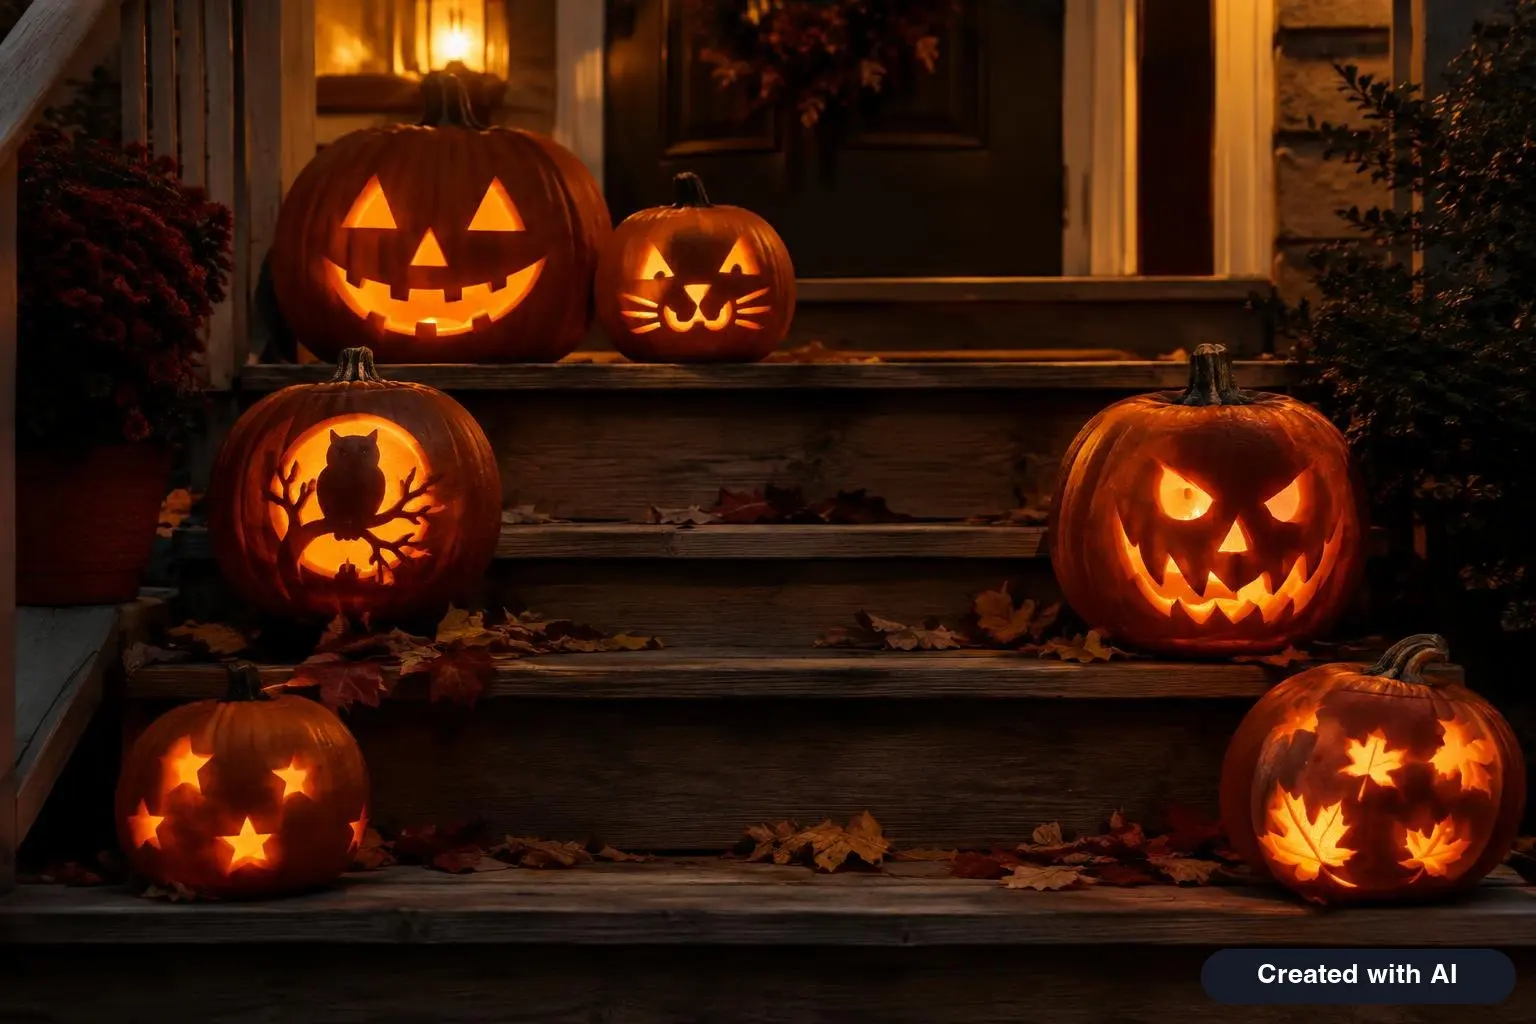
To carve a pumpkin, cut an angled lid (or a hole in the bottom), scoop out the seeds and strings, thin the wall behind your design to about an inch, transfer a pattern onto the skin, and saw along the lines with a small serrated tool, working from the center outward. One pumpkin takes 30 to 60 minutes. Carve no more than two to four days ahead: for Halloween 2026, which falls on Saturday, October 31, that means Wednesday through Friday. Below are 45 carving ideas sorted by difficulty, how to use and make stencils, the tools worth having, no-carve options, how to keep a jack-o'-lantern fresh and what to do with the seeds and flesh.
How to Pick a Pumpkin for Carving
University of Illinois Extension, in the state that grows more pumpkins than any other, gives simple rules for an ornamental (carving) pumpkin:
- Look for one to two inches of stem. A stem cut too short lets the pumpkin decay quickly.
- Never carry it by the stem. The stem is not a handle; if it snaps off, the exposed spot spoils early. Carry the pumpkin from underneath.
- Avoid blemishes and soft spots. Press gently around the base and the stem.
- It should feel heavy. Shape does not matter; a lopsided pumpkin is not a bad pumpkin, and an odd shape often suggests a better face.
Also check that it sits flat without rolling, and pick a pumpkin with one smooth, fairly even side if you plan to use a stencil. Light-colored or ribbed varieties are harder to transfer patterns onto but look striking with simple shapes.
| Pumpkin size | Best for | Notes |
|---|---|---|
| Mini (under 2 lb) | No-carve decorating, drilled dots, table settings | Walls are too tight for detailed carving |
| Small (4–8 lb) | First carving with kids, simple faces | Pie or sugar pumpkins fall in this range; the flesh is dense, so carving takes more effort, but they are the best ones to eat |
| Medium (10–15 lb) | Classic jack-o'-lanterns and most printed stencils | Fits a letter-size pattern |
| Large (20 lb and up) | Detailed scenes, shaved designs, "pumpkin eating a pumpkin" | Thick walls; plan on extra scooping |
Carving pumpkins and cooking pumpkins are different. Jack-o'-lantern types are bred to be large, with stringier pulp and more watery flesh; pie pumpkins are smaller, sweeter and smoother. If cooking matters more to you than carving, buy one of each.
Pumpkin Carving Tools
| Tool | What it does | Household substitute |
|---|---|---|
| Small serrated pumpkin saw | Cuts curves and details with a sawing motion; far less likely to slip than a smooth blade | A drywall (keyhole) saw for the lid; a serrated paring knife for adults only |
| Scoop or scraper | Clears seeds and thins the wall | Ice cream scoop, large metal spoon or the edge of a metal measuring cup |
| Poker tool or pushpin | Transfers a stencil by punching dots through the paper | Thumbtack, nail or toothpick |
| Dry-erase or washable marker | Freehand drawing that wipes off | Grease pencil; avoid permanent marker, which shows on the finished pumpkin |
| Linoleum cutter or clay loop tool | Shaves skin without cutting through, for etched designs | Vegetable peeler or the tip of a melon baller |
| Power drill with assorted bits | Makes clean round holes for dot patterns and constellations | Apple corer for large holes, metal skewer for small ones |
| Cookie cutters and a rubber mallet | Punches stars, bats and letters in one tap | Metal cutters only; plastic ones crack |
| Petroleum jelly, spray bottle, bleach | Preservation after carving | See the freshness section below |
| Battery-operated candles | Safe light | Glow sticks, a small flashlight or a short string of battery LED lights |
Cover the table with newspaper or a cut-open trash bag and keep two bowls handy: one for seeds, one for strings and scraps. Clean the tools before you start, especially if you are carving several pumpkins; South Dakota State University Extension recommends sterilizing carving equipment to avoid spreading the organisms that cause rot.
How to Carve a Pumpkin: Step by Step
- Wash and dry the pumpkin. Wipe off soil so you do not carry it inside with the knife. Dry the pumpkin, your hands and the tools; wet handles slip.
- Decide where to open it. A lid on top is traditional. A hole in the bottom or the back keeps the stem intact, lets the pumpkin sit over a light and hides the opening.
- Cut the lid at an angle. Tilt the blade toward the center so the lid rests on a ledge and cannot fall in. Cut a small notch at the back so it only fits one way.
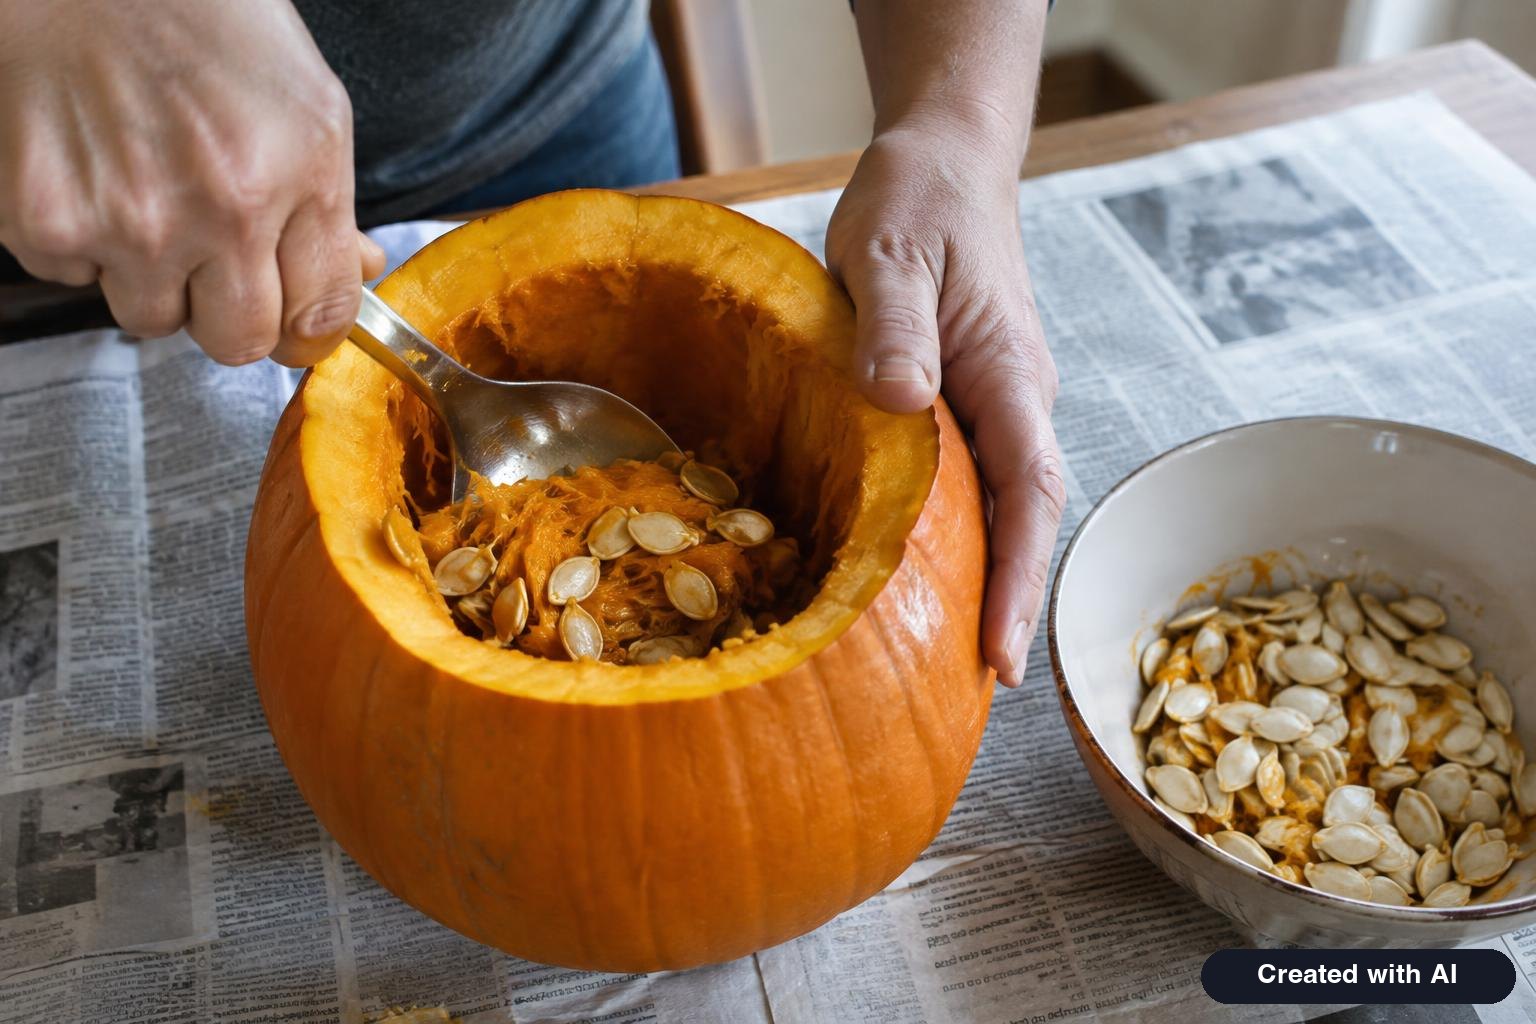
- Scoop it out. Pull out the seeds and strings by hand, then scrape the walls clean. The more stringy material you remove, the less surface there is for mold. Save the seeds.
- Thin the carving wall. Scrape the side you will carve to roughly one inch thick. Push a pin through to check.
- Transfer the design. Tape on a stencil and poke along the lines, or draw freehand with a dry-erase marker. Details are in the next section.
- Saw, do not push. Hold the saw like a pencil, straight into the pumpkin, and move it up and down with light pressure. Start with the smallest shapes in the middle of the design and work outward so the wall stays strong while you cut.
- Pop pieces out from the inside. Push with a finger, not the blade. Cut large pieces in halves first.
- Clean the edges. Trim ragged cuts and bevel them inward at an angle so more light escapes.
- Preserve and light it. Rinse or spray with a diluted bleach solution, let it drain, coat the cut edges with petroleum jelly and add a battery candle.
If a piece breaks off, pin it back in place with a toothpick. Nobody will see it after dark.
Pumpkin Carving Stencils and Patterns: How to Use Them
A stencil is a printed pattern showing which areas to cut away. Free printable stencils are easy to find; what matters is choosing one that suits your skill and transferring it cleanly.
Transferring a stencil
- Print the pattern and resize it so it covers no more than about two-thirds of the pumpkin's face.
- Trim the paper close to the design and snip slits into the margins so it wraps around the curve without wrinkling.
- Tape it down firmly at the top, then the sides.
- Poke holes along every line about an eighth of an inch apart. Closer on tight curves.
- Remove the paper and keep it nearby for reference. If the dots are hard to see, rub flour or baby powder over them, or connect them with a dry-erase marker.
- Carve along the dots.
Reading a stencil
- Cut-through patterns use two tones: one to remove, one to keep. Everything you keep must stay connected to the rest of the pumpkin. A floating piece, such as the pupil of an eye, needs a small "bridge" of pumpkin to hold it.
- Shaded patterns use three tones: cut out completely, shave the skin off (the flesh glows amber) and leave alone (dark). They look like photographs when lit, and they take two to three times as long.
Making your own pattern
Draw the design on paper with a thick black marker, fill in the areas to be removed, then check each black area: is everything around it still attached? Keep bridges at least half an inch wide. Simple silhouettes work best: a cat with an arched back, a bat, a crescent moon, a house with lit windows, a child's initial. Bold lettering works too, but letters with enclosed centers (A, B, D, O, P, Q, R) need bridges.
45 Pumpkin Carving Ideas by Difficulty
Easy pumpkin carving ideas for beginners and kids (15 to 30 minutes)
- Classic triangle face. Two triangle eyes, a triangle nose and a wide grin with three square teeth. Straight cuts only.
- Surprised pumpkin. Two round eyes and a big O for the mouth. Use an apple corer for the eyes.
- Sleepy pumpkin. Half-moon eyes, cut flat on top, with a small yawning oval.
- One-eyed monster. A single large circle in the center and a zigzag mouth below.
- Toothy grin. Tiny dot eyes and a huge crescent smile with one tooth up and one down.
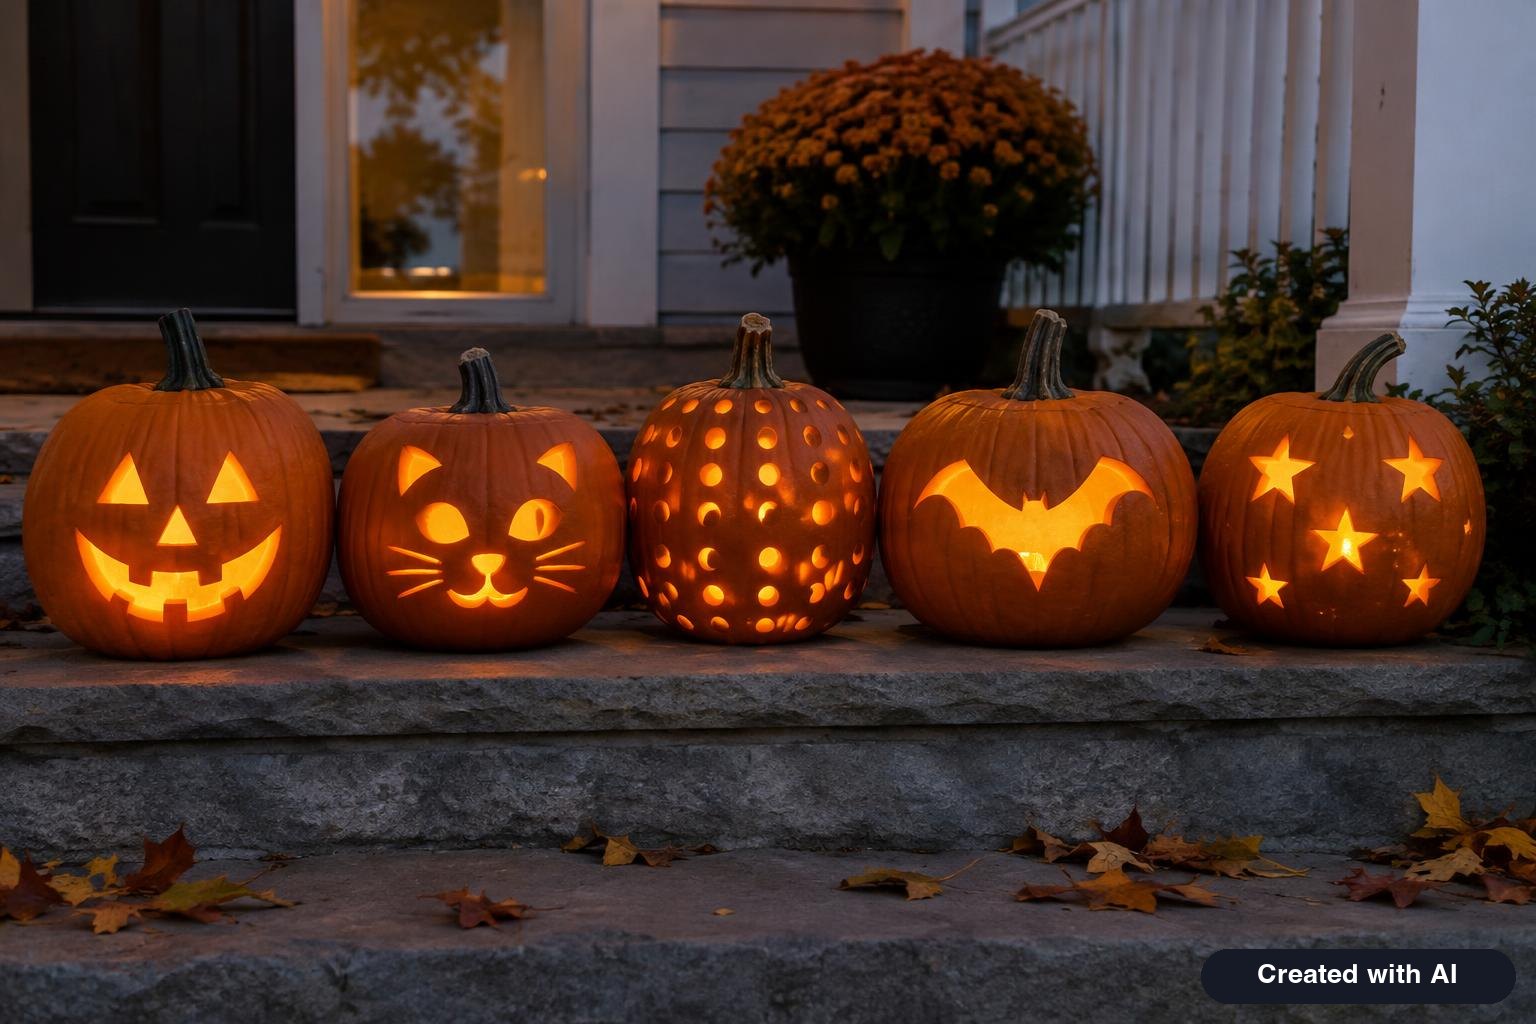
- Cookie-cutter stars. Tap metal star cutters through the wall with a mallet in a scattered pattern. No face needed.
- Polka dots. Drill holes in three sizes all over the pumpkin.
- Ghost. A rounded ghost outline with two oval eyes left in place by bridges at the top.
- Heart eyes. Two hearts and a simple smile; a friendly pumpkin for a toddler's porch.
- Single word. BOO in block letters, with the Os bridged at top and bottom.
- Crescent moon and stars. One large moon with three drilled stars around it.
- House number. Your street number carved large, so the pumpkin doubles as a porch marker for trick-or-treaters.
Cute and funny pumpkin carving ideas (30 to 45 minutes)
- Black cat face. Almond eyes with slit pupils, a small triangle nose and whiskers etched into the skin; add carved-scrap ears with toothpicks.
- Owl. Two large round eyes with shaved rings, a triangle beak and rows of U-shaped feather cuts.
- Winking face. One round eye, one curved line and a tongue sticking out.
- Glasses and mustache. Round spectacle frames and a curled handlebar mustache; an easy portrait of a grandparent.
- Buck teeth. A goofy grin with two long rectangular teeth left in place.
- Baby pumpkin. A small face with a real pacifier pushed into the mouth hole.
- Pumpkin eating a pumpkin. A large pumpkin with a wide jagged mouth and a mini pumpkin wedged between its teeth.
- Sick pumpkin. Squinting eyes, a wide-open mouth, and the seeds and strings arranged spilling out of it onto the step.
- Braces. A big smile with every tooth left in place and a line of silver pushpins connected by wire.
- Spider web. Radiating straight lines and curved connectors, with a plastic spider on top.
- Bat silhouette. One wide bat across the front, wing tips scalloped.
- Candy corn. Three stacked bands: cut out the top, shave the middle and leave the bottom whole.
Scary pumpkin carving ideas (45 to 60 minutes)
- Angry jack. Eyes slanted steeply inward, flared nostrils and a mouth full of pointed teeth.
- Stitched mouth. A long thin slit crossed by short vertical cuts, with hollow round eyes.
- Skull. Large eye sockets, an upside-down heart for the nose and a row of narrow rectangular teeth. Works best on a white pumpkin.
- Vampire. Arched brows, narrow eyes and two long fangs dropping from the upper lip.
- Witch on a broom. A full-moon circle shaved from the skin with a witch silhouette left dark inside it.
- Haunted house. A crooked roofline with four small windows cut through and a shaved moon behind.
- Clawed hand. Three long gashes as if something scratched its way out.
- Peeking eyes. Only two narrow glowing eyes, low on the pumpkin, with nothing else carved. Simple and unsettling in the dark.
- Graveyard scene. Three tombstones, a bare tree and a low fence around the middle of the pumpkin.
- Screaming face. Tall oval eyes pulled downward and a long open mouth.
Advanced and creative pumpkin carving ideas (one hour or more)
- Shaved portrait. A three-tone pattern made from a photo of a pet. Shave lightly first; you can always go deeper.
- Constellation pumpkin. Drill a real constellation, such as Orion or the Big Dipper, and connect the stars with shallow etched lines.
- Lace pumpkin. Rows of drilled holes in alternating sizes forming scallops around the whole pumpkin.
- Wraparound forest. Bare tree trunks shaved all the way around, with small cut-through owl eyes among them.
- Diorama. Cut away a third of the front and build a small scene inside: moss, toy skeletons, a battery tea light.
- Sideways pumpkin. Lay the pumpkin on its side and use the stem as a long crooked nose.
- Stacked totem. Three pumpkins of decreasing size, each with a different face, held together by a dowel.
- Relief sculpture. Peel the skin from the whole face and carve features into the thick flesh with clay loop tools, without cutting through.
- Monogram wreath. A family initial inside a ring of etched leaves.
- Cityscape. A skyline silhouette around the base with dozens of tiny square windows.
- Pumpkin lantern. Vertical slots cut all the way around, like a paper lantern, so light throws stripes across the porch.
No-Carve Pumpkin Ideas
Uncarved pumpkins last far longer, are safe for small children to make and can go back in the kitchen afterward if you keep paint and glue off them. The American Academy of Pediatrics recommends that small children decorate pumpkins instead of carving them.
- Painted faces. Acrylic craft paint covers best. Prime a slick pumpkin with a coat of white first.
- Marker drawings. A black permanent marker makes a jack-o'-lantern face in two minutes.
- Mummy. Wrap in gauze or cut strips of white fabric and glue on two googly eyes.
- Sticker and washi tape patterns. Stripes, plaid or a child's free-for-all.
- Glow-in-the-dark paint. Dots, drips or a spider web that appears when the porch light goes off.
- Melted crayon. Glue unwrapped crayons around the stem of a white pumpkin and melt them with a hair dryer so the wax runs down the sides. An adult handles the heat.
- Chalkboard pumpkin. Coat with chalkboard paint and write a new message every day.
- Thumbtack designs. Push brass tacks in rows to make a monogram or a studded pattern.
- Yarn-wrapped. Wrap a mini pumpkin in orange or black yarn secured with craft glue.
- Decoupage leaves. Brush pressed leaves or tissue-paper shapes on with decoupage glue.
- Push-in face pieces. Plastic eyes, noses and mouths made for pumpkins (or borrowed from a toy box) push straight into the rind, and toddlers can rearrange them.
- Spider pumpkin. Paint it black and attach eight pipe-cleaner legs.
- Teal pumpkin. Paint one teal to show that you offer non-food treats for children with food allergies.
- Drilled, not carved. If an adult runs the drill, a pattern of holes gives the glow of a carved pumpkin with little mess.
More projects that children can do themselves are in our Halloween crafts for kids.
Pumpkin Carving Safety
The Consumer Product Safety Commission estimates that about 3,200 Halloween-related injuries are treated in U.S. emergency departments each year, and 55% of them are related to pumpkin carving. Most are cuts to the hand that is holding the pumpkin steady.
- Adults carve; children scoop and draw. That is the advice of both the CPSC and the American Academy of Pediatrics.
- Use a pumpkin saw, not a kitchen knife. A large smooth blade wedges in the rind and comes free with force.
- Keep everything dry. Wipe hands, tools and the pumpkin's surface as you go.
- Work on a stable, well-lit surface at table height, with the pumpkin resting in a towel ring so it cannot roll.
- Cut away from yourself in small strokes, and keep your free hand above the blade, never in its path.
- Stop if the blade sticks. Wiggle it out gently; do not yank.
- For a cut that keeps bleeding despite firm, steady pressure, or any numbness in a finger, get medical care.
The safest way to light a jack-o'-lantern
Use a battery-operated flameless candle, a flashlight or a glow stick. The National Fire Protection Association reports an average of 835 home structure fires a year that begin with decorations, about a third of them started by candles. A flameless light also keeps the pumpkin fresh longer, because a candle slowly cooks the inside. If you do use a real candle, the AAP says a votive is safest, and a candlelit pumpkin should never sit on a porch or path where costumes may brush past it. Never leave it burning unattended.
How to Keep a Carved Pumpkin Fresh
Carving exposes the flesh to mold spores and bacteria, and a jack-o'-lantern can begin to discolor, collapse or smell within a few days. Extension services at South Dakota State and Utah State recommend the same routine:
- Start clean. Wash the outside before cutting and clean your tools.
- Scrape thoroughly. Remove as much of the stringy interior as you can.
- Disinfect. Dip, wash or spray the finished carving with a 10 percent bleach solution, which is one part household bleach to nine parts water. Let it drain and dry.
- Seal the cuts. Rub petroleum jelly on every exposed edge to slow drying.
- Skip the candle. Use an electric light or glow stick so the pumpkin does not cook from the inside.
- Keep it cool. The ideal range is 50 to 60°F. Warmth speeds decay; freezing damages the tissue, and a thawed pumpkin rots fast. Bring it in on a frosty night and keep it out of afternoon sun.
| Pumpkin | How long it lasts |
|---|---|
| Uncarved, stored cool (45–50°F), dark and dry | Three to six months, according to Illinois Extension |
| Uncarved, on a shaded porch | Usually several weeks, depending on weather |
| Carved, untreated, in mild weather | A few days before it starts to sag |
| Carved, disinfected, sealed and kept cool | Often about a week |
Two home tricks are widely used but are not on the extension lists, so treat them as optional: soaking a shriveled pumpkin in cold water for a few hours to firm it up, and wrapping it in plastic in the refrigerator overnight. One caution from Illinois Extension: do not give a bleach-treated pumpkin to farm animals.
What to Do With Pumpkin Seeds and Flesh
Roasted pumpkin seeds
Seeds from any pumpkin, including a jack-o'-lantern, are good to eat. The National Center for Home Food Preservation treats drying and roasting as two separate steps:
- Wash. Rinse the seeds in a colander and pick off the clinging fibers.
- Dry. Dry them in a dehydrator at 115 to 120°F for one to two hours, or in an oven on the warm setting for three to four hours, stirring often so they do not scorch.
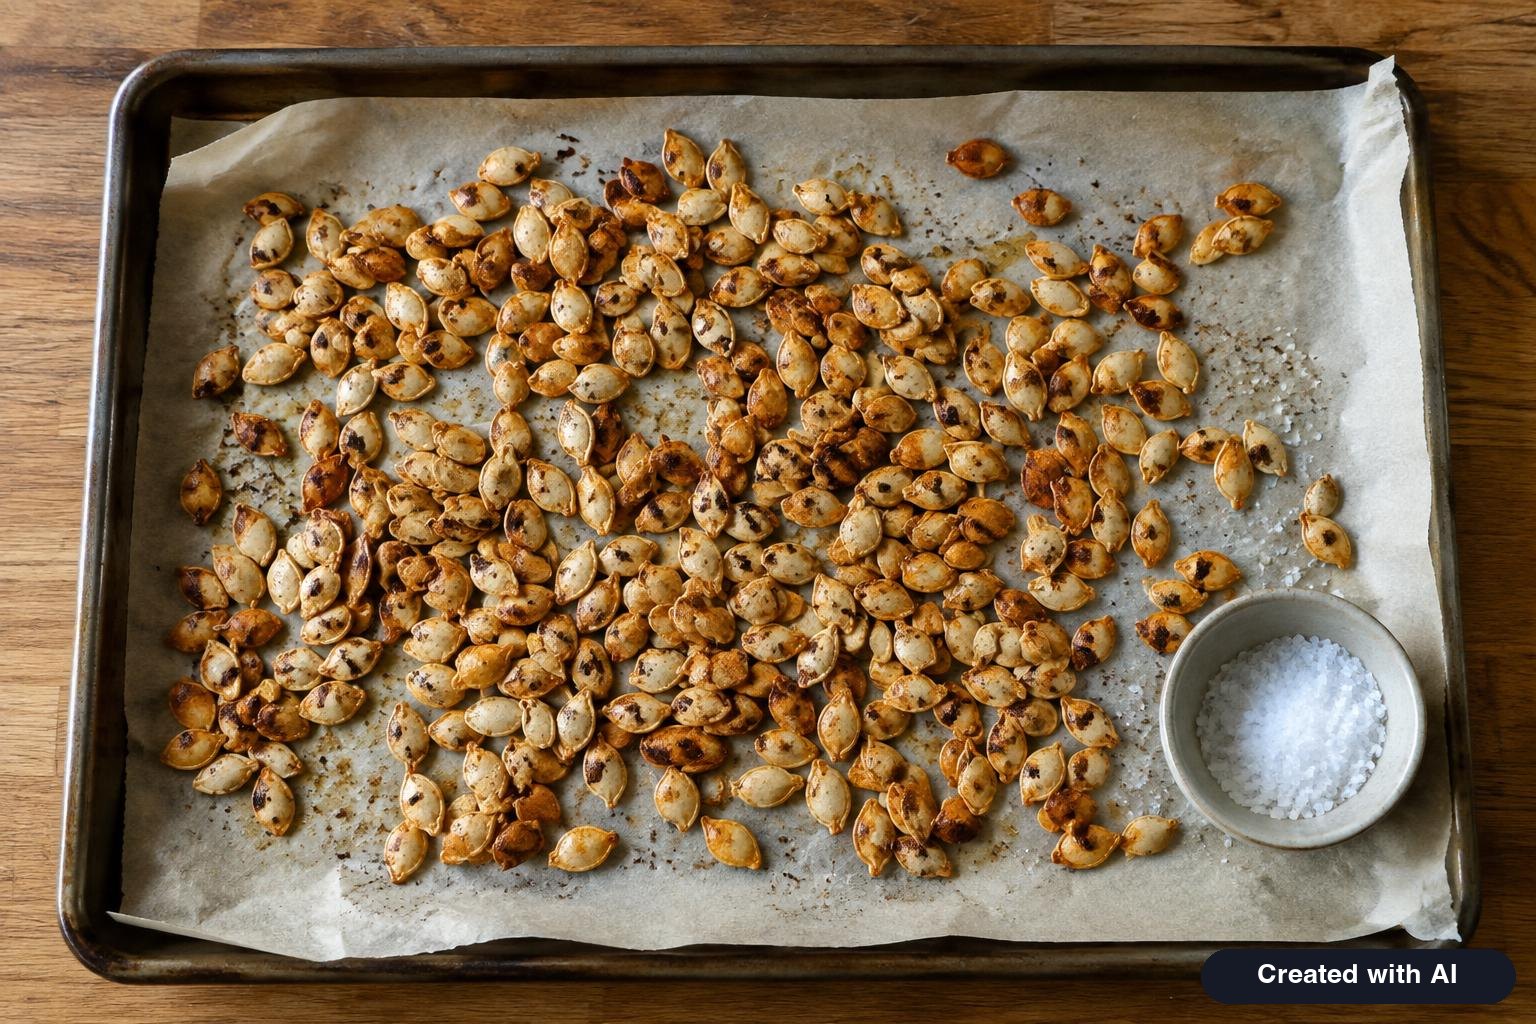
- Season. Toss the dried seeds with a little oil and salt. Good additions: garlic powder, smoked paprika, cumin, or cinnamon and sugar.
- Roast. Roast in a preheated 250°F oven for 10 to 15 minutes.
- Store. Cool completely and keep in a sealed container at room temperature.
Many extension recipes skip the separate drying step and roast patted-dry seeds longer, 30 to 40 minutes with a stir every 10 minutes, until golden. Either way works; the seeds are done when they are crisp and smell toasted.
Using the flesh
Purdue Extension's answer to "can you eat your jack-o'-lantern?" is yes, as long as the pumpkin is in good condition and has not yet been carved. Carving pumpkins are more watery and stringy than pie pumpkins but still give fairly good results. A pumpkin that has sat carved on the porch, been treated with bleach or held a candle belongs in the compost, not the kitchen.
The practical approach: cook the pieces you cut out and the flesh you scrape from the walls on carving day, or buy an extra pie pumpkin. To make puree, wash the pumpkin, cut it into chunks, cook until fork-tender (boiled, steamed, microwaved or baked), then scoop the pulp from the rind and mash it. Refrigerate and use within three to four days, or freeze in one-cup portions for up to a year. Use it cup for cup in place of canned pumpkin.
From there, our pumpkin recipes take over: roasted pumpkin is the simplest way to cook fresh wedges, and puree goes into pumpkin soup, pumpkin muffins, pumpkin pancakes, pumpkin cake and pumpkin jam.
After Halloween
Compost old pumpkins at home, or look for a community pumpkin smash, where pumpkins are collected and composted. Remove candles, paint, glitter and other decorations first; smashing the pumpkin into pieces speeds things up. Illinois Extension warns against tossing pumpkins into woods, ditches or forest preserves, which counts as littering, and notes that the Illinois Department of Natural Resources does not recommend feeding pumpkins to wildlife because it can spread disease. Rules differ by state, so check locally before leaving one out for deer.
Pumpkin Facts for the Carving Table
- U.S. farmers grew 1.47 billion pounds of pumpkins in 2025, according to USDA's Economic Research Service.
- Illinois produced about 533 million pounds, slightly more than the next four states (California, Indiana, Michigan and Pennsylvania) combined. Most Illinois pumpkins are grown for canning, not carving.
- About 85% of U.S. pumpkin acreage is grown for the fresh and ornamental market, which includes jack-o'-lanterns.
- The first jack-o'-lanterns were turnips. The custom came from Ireland and Britain; pumpkins took over in North America because they were larger and easier to carve. The full story is in our Halloween guide.
- In the National Retail Federation's 2026 survey, 42% of Americans celebrating Halloween planned to carve a pumpkin.
Once the pumpkins are lit, see our Halloween decorations for the rest of the porch and Halloween captions for the photos.
Frequently asked questions
When should you carve pumpkins for Halloween?
Carve two to four days before Halloween. A carved pumpkin can start to discolor and collapse within a few days. For Halloween 2026, a Saturday, carve between Wednesday, October 28 and Friday, October 30. Uncarved pumpkins keep for weeks, so buy early and carve late.
What is the easiest thing to carve on a pumpkin?
A classic face made only of straight cuts: triangle eyes, a triangle nose and a wide mouth with square teeth. Even easier are designs with no face at all, such as holes made with a drill or stars punched out with metal cookie cutters and a mallet.
How do you use a pumpkin carving stencil?
Print the pattern, tape it to the smoothest side of the pumpkin, and poke holes along every line with a pin or poker tool about an eighth of an inch apart. Remove the paper, dust the dots with flour so they show, and saw from dot to dot, starting with the smallest shapes in the center.
How do you keep a carved pumpkin from rotting?
Extension services recommend cleaning the pumpkin and tools, scraping the inside thoroughly, rinsing or spraying the carving with a 10 percent bleach solution, coating cut edges with petroleum jelly, lighting it with an LED instead of a candle and keeping it at 50 to 60°F, out of sun and frost.
How long does a carved pumpkin last?
Usually a few days untreated in mild weather, and often about a week if it is disinfected, sealed and kept cool. Warm weather shortens that, and a hard freeze followed by a thaw ruins a pumpkin quickly. An uncarved pumpkin stored cool and dry can last three to six months.
What tools do you need to carve a pumpkin?
A small serrated pumpkin saw, a sturdy scoop or large metal spoon, a pin or poker for transferring the pattern and a dry-erase marker. A drill, metal cookie cutters and a linoleum cutter or clay loop add dot patterns, punched shapes and shaved designs. Finish with a battery-operated candle.
Can you eat a carving pumpkin?
Yes, if it is in good condition and has not yet been carved and displayed. Carving pumpkins are more watery and stringy than pie pumpkins but still cook into usable puree. Seeds from any pumpkin can be roasted. Do not eat a jack-o'-lantern that has sat outside or been treated with bleach.
What can kids do instead of carving a pumpkin?
Children can scoop out seeds, draw the face for an adult to cut, or decorate an uncarved pumpkin with paint, markers, stickers, washi tape, gauze for a mummy or pipe-cleaner spider legs. The American Academy of Pediatrics advises that small children decorate, not carve.
Sources
- University of Illinois Extension: Choosing a pumpkin
- South Dakota State University Extension: Pumpkin carving preservation
- Utah State University Extension: Preserve your jack-o'-lanterns
- U.S. Consumer Product Safety Commission: Halloween safety tips and injury estimates
- American Academy of Pediatrics (HealthyChildren.org): Halloween fun and safety tips
- National Fire Protection Association: Halloween fire safety
- Purdue Extension: Can you eat your jack-o'-lantern pumpkin?
- University of Illinois Extension: Roasted pumpkin seeds
- University of Illinois Extension: How to safely dispose of old pumpkins after Halloween
- USDA Economic Research Service: Pumpkins, background and statistics
- National Retail Federation: 2026 Halloween consumer survey (September 22, 2026)
- FARE: Teal Pumpkin Project
Log in to comment
No comments yet. Be the first.