How to Photograph the Northern Lights With a Phone or Camera (Settings Guide)
- A tripod is the single most important accessory; phones unlock longer night exposures when they are steady.
- On iPhone use Night mode with the longest exposure offered; on Pixel, Night Sight switches to Astrophotography on a tripod.
- Phone manual mode starting point: focus at infinity, ISO around 1600, 4–6 seconds, flash off.
- Camera starting point: f/2.8–f/4, 3–7 s for fast aurora or 10–25 s for faint aurora, ISO 800–4000, RAW.
- Focus manually on a bright star and shorten exposures when the aurora moves fast.
- Why cameras see more than your eyes
- Before you go: what to bring
- How to take photos of the northern lights on an iPhone
- How to photograph the northern lights with Android and Samsung phones
- Camera settings for northern lights photography
- Composition: make it more than a green sky
- Shooting from a backyard or small town in the lower 48
- Video, time-lapse and burst
- Northern lights photo apps and editing
- Common mistakes and how to fix them
This article is part of the 77.today Night Sky Guide, prepared by the 77.today editors from the sources listed at the end.
One of the surprises of the big aurora storms of recent years was how many people discovered the northern lights through their phones. A faint gray-green haze that the eye barely registers can come out vivid green, pink and red in a few seconds of exposure. That is not trickery: camera sensors collect light over time and see color in conditions where the human eye switches to black-and-white night vision. This part of our Night Sky Guide explains how to photograph the northern lights with an iPhone, an Android phone and a dedicated camera, with starting settings in tables, plus composition, cold-weather tips and the most common mistakes.
Why cameras see more than your eyes
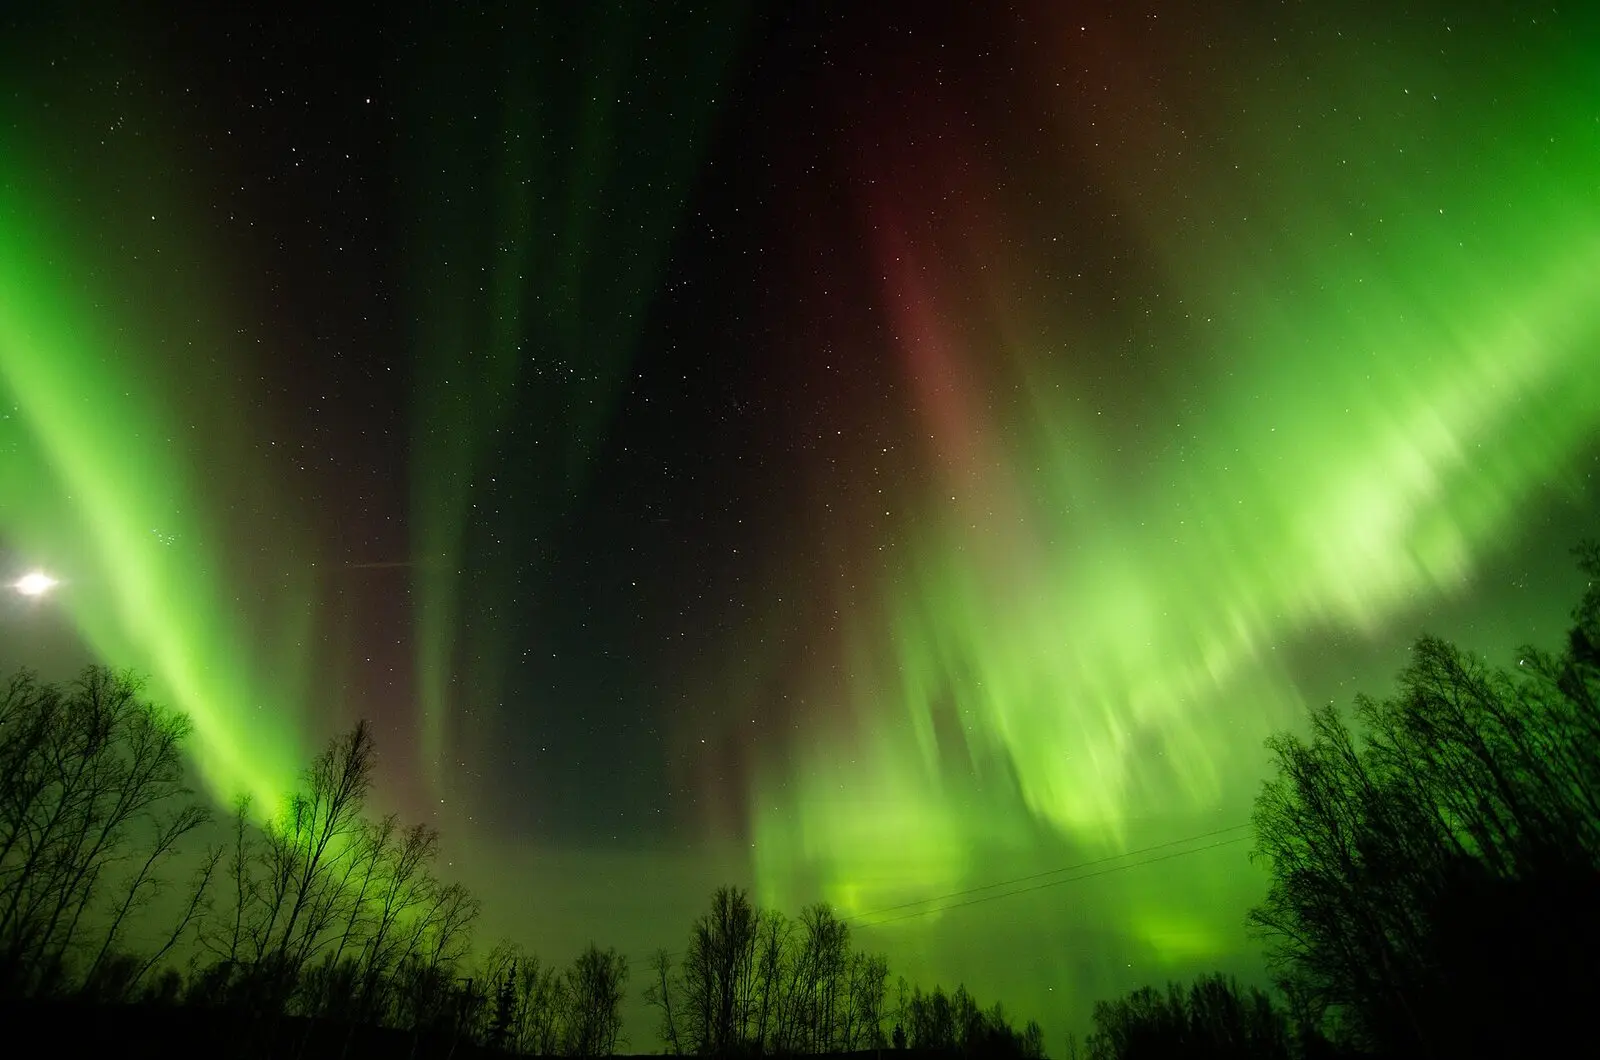
The aurora at mid-latitudes is often too faint to trigger the color-sensitive cone cells in the eye, so it looks like a pale cloud or a gray glow low in the north. A camera does not have that limit. By keeping the shutter open for seconds instead of fractions of a second, it gathers enough light to show the true colors: green from oxygen lower down, red from oxygen higher up, and blue and purple from nitrogen, as the National Park Service explains on its Voyageurs northern lights page. That is why a quick test photo is the best way to tell whether a glow on the horizon is the aurora or light pollution.
The flip side is that long exposures need a camera that does not move. Every tip below comes back to the same rule: stabilize the phone or camera, then let it collect light.
Before you go: what to bring
| Item | Why |
|---|---|
| Tripod or phone mount | Long exposures blur if handheld; phones also unlock longer night modes when they detect a steady mount |
| Spare batteries or a power bank | Cold drains batteries fast; keep spares in an inside pocket |
| Headlamp with a red setting | Lets you see the controls without ruining your night vision |
| Remote shutter or self-timer | Pressing the button shakes the camera; a 2- or 3-second timer avoids it |
| Lens cloth | Breath and temperature changes fog lenses |
| Warm layers, gloves with touchscreen tips | Aurora shoots involve standing still for hours |
How to take photos of the northern lights on an iPhone
On iPhone 11 and later, Apple's built-in Night mode is the easiest route. According to Apple's iPhone User Guide, Night mode turns on automatically in low light and the iPhone sets the exposure time automatically, but you can adjust it manually. Apple's tip is to use a tripod "for even more detailed Night mode photos," and its Night mode support page suggests placing the iPhone on a solid surface or a tripod to increase stability and control of exposure.
- Mount the iPhone on a tripod or prop it firmly against something solid, pointing north.
- Open Camera in Photo mode. In low light, Night mode turns on automatically; you can switch it on or off with the Night mode button.
- Open the camera controls, tap Night Mode and choose the longest of the exposure options offered. Apple notes that your selection is saved for the next Night mode photo.
- Turn off the flash, and tap and hold on a distant light or bright star to lock focus and exposure.
- Use the self-timer or a Bluetooth remote, then keep still while the capture runs. If crosshairs appear, the phone has detected movement.
- Shoot several frames as the aurora changes. If your model supports Apple ProRAW, it gives more room for editing later.
Newer models such as the iPhone 15 and iPhone 16 follow the same steps; the main differences between generations are how long Night mode can expose and how much noise appears in the shadows.
How to photograph the northern lights with Android and Samsung phones
On Google Pixel phones, Google's help page explains that Night Sight is in the Photo mode carousel, and that on a stand or tripod the shutter switches automatically to Astrophotography mode when the phone is still. Without a tripod you can drag the Night Sight slider to "Astro." Google adds that for photos of stars you should travel away from city lights and shoot at least 45 to 90 minutes after sunset; astrophotography works only at zoom settings of 1x or more on recent Pixels. For a bright, fast-moving aurora, regular Night Sight with a shorter capture often keeps more structure than the long Astro mode.
Many other Android phones, including Samsung Galaxy models, have a Night mode and a Pro or manual mode that lets you set ISO, shutter speed and focus yourself. The manual route gives the most control:
| Phone setting (Pro/manual mode) | Starting point | Adjust if… |
|---|---|---|
| Focus | Manual, set to infinity (the mountain icon or slider end) | Stars look like blobs: refocus on a bright star |
| Shutter speed | 4–6 seconds | Aurora is moving fast: go shorter; faint and still: go longer |
| ISO | Around 1600 | Image too dark: raise ISO; too grainy: lower ISO and lengthen exposure |
| White balance | Manual, about 3500–4000 K, or auto | Sky looks orange: lower the Kelvin value |
| Format | RAW (DNG) plus JPEG if available | Phone storage is limited: JPEG only |
| Flash | Off | – |
These are starting points rather than fixed rules: the Colorado-based adventure photographer Frankie Spontelli, writing on fr33water.com, suggests around ISO 1600 and 4–6 second exposures on phones with a manual mode, locked focus at infinity, flash off and a timer or remote. Expect to adjust after the first test frame.
Camera settings for northern lights photography
A mirrorless or DSLR camera with a wide, fast lens gives the best results. The table below uses the ranges recommended by professional night-sky photographer Dave Morrow in his northern lights photography guide: apertures of f/2.8 to f/4, shutter speeds of roughly 3–7 seconds for fast-moving aurora and 10–25 seconds for slower or fainter displays, ISO usually between 800 and 4000, white balance of 3000–5000 K and RAW files.
| Setting | Bright, fast-moving aurora | Faint or slow aurora (mid-latitudes) |
|---|---|---|
| Mode | Manual (M) | Manual (M) |
| Lens | Widest you have (about 14–24 mm full-frame equivalent) | Same |
| Aperture | f/2.8 (or widest) | f/2.8 (or widest) |
| Shutter speed | 3–7 seconds | 10–25 seconds |
| ISO | 800–1600 | 1600–4000 |
| White balance | 3500–4000 K | 3000–4500 K |
| Focus | Manual, on a bright star using live view magnification | Same |
| File format | RAW | RAW |
| Stabilization | Off on a tripod; 2-second timer or remote | Same |
The order of operations matters. Morrow's advice is never to raise ISO to brighten an image before you have opened the aperture to its widest value and set the longest shutter speed that still keeps detail in the aurora. Long exposures smooth out the fine rays and curtains of an active display into a green smear, so when the sky is moving fast, shorten the exposure and accept a little more noise.
Autofocus does not work reliably in the dark. Focus manually on a bright star or a distant light, zoom in on the screen to check that it is a sharp point, then leave the focus ring alone – or tape it – for the rest of the night.
Composition: make it more than a green sky
The photos people remember have something on the ground: a lake reflecting the aurora, a line of spruce trees, a cabin with a lit window, a person with a headlamp. A few habits help:
- Scout in daylight so you know where north is and what will sit in the foreground.
- Use the rule of thirds with the horizon low, giving most of the frame to the sky when the aurora is high.
- Look for reflections in calm water or wet sand; they double the color.
- Shoot vertical too – tall rays and coronas overhead often fit better in a portrait frame.
- Light painting with a dim, warm light for a second or two can lift a foreground, but keep it subtle and never shine lights at other viewers.
Shooting from a backyard or small town in the lower 48
During a strong storm you may not have time to drive to a dark park, and you do not need to. Walk to the darkest corner of your yard or a nearby park, turn your back to streetlights, and point the phone low to the north. Put the phone on a fence post or a car roof if you have no tripod, use the self-timer, and take a Night mode photo. If the sky looks orange or brown, that is light pollution; frame the shot higher, or wait for the aurora to climb. In mid-latitude storms the aurora is often red or pink rather than green, so do not dismiss a reddish glow – it is frequently the upper part of a display whose green base is below your horizon. Keep shooting every few minutes: a quiet sky can brighten within minutes when a substorm begins, and the best frames of a night often come in a short burst of activity.
Video, time-lapse and burst
Recent phones can record the aurora in Night mode time-lapse, and a camera on an interval timer can build a time-lapse from hundreds of stills. A simple approach for cameras is to shoot continuous 4–8 second exposures for 30–60 minutes and assemble them later. Real-time video of the aurora needs a very sensitive camera and a bright display; for most people, a time-lapse captures the motion better.
Northern lights photo apps and editing
Searches for a "northern lights photo taker app" usually come from people whose phone's default camera did not cooperate. Before downloading anything, try the built-in Night mode or Night Sight on a tripod – it is free and often better than third-party apps. If your phone lacks a manual mode, a camera app that offers manual ISO, shutter and focus control can help, as can apps that save RAW files.
Editing is where the photo is finished. In any editor, start with white balance (a slightly cool sky keeps the greens natural), then exposure and contrast, then a light touch of noise reduction. Avoid pushing saturation until the aurora turns neon – a natural look is more convincing and more honest about what was in the sky.
Common mistakes and how to fix them
| Problem | Likely cause | Fix |
|---|---|---|
| Everything is blurry | Camera moved or focus is off | Use a tripod and timer; refocus manually on a star |
| Stars are streaks | Exposure too long for the lens | Shorten the exposure or use a wider lens |
| Aurora is a featureless smear | Exposure too long for a fast display | Go down to 2–5 seconds and raise ISO |
| Orange or yellow sky | City light pollution, auto white balance | Face away from towns; set white balance around 3500 K |
| Very grainy image | ISO too high | Open the aperture, lengthen exposure, then lower ISO |
| Battery died early | Cold | Carry spares in an inside pocket and swap often |
The best camera settings are useless without a sky worth photographing, so start with the northern lights forecast and the northern lights tonight page, and pick a spot from our guide to where to see the northern lights. The same tripod-and-long-exposure technique also works for meteor showers and the Milky Way, and for daytime landscapes, our guide to golden hour and blue hour shows when the light is best.
Cover photo: FairbanksMike, Wikimedia Commons (CC BY 2.0).

Frequently asked questions
What are the best phone camera settings for northern lights?
Use Night mode on a tripod with the longest exposure offered. In a manual or Pro mode, start with focus at infinity, ISO around 1600 and a 4–6 second exposure with the flash off, then adjust after a test shot.
How do I take photos of the northern lights on my iPhone?
Put the iPhone on a tripod or solid surface, let Night mode turn on, choose the longest exposure in the camera controls, turn off the flash, and use the self-timer so you do not shake the phone. Apple recommends a tripod for more detailed Night mode photos.
How do I photograph the northern lights with an Android phone?
Use the phone's Night mode or a Pro/manual mode on a tripod. On Google Pixel phones, Night Sight switches automatically to Astrophotography mode when the phone is still on a stand or tripod.
What camera settings should I use for the aurora?
A common starting point is manual mode, the widest lens you have at f/2.8 to f/4, 3–7 seconds for fast aurora or 10–25 seconds for faint aurora, ISO between 800 and 4000, white balance around 3500–4000 K, manual focus on a star and RAW files.
Why do the northern lights look brighter in photos than in real life?
Camera sensors collect light over several seconds and record color, while the human eye sees mostly in black and white at low light levels. Faint aurora can look gray to the eye but green or red to the camera.
Do I need a special app to photograph the northern lights?
Usually not. Built-in Night mode or Night Sight on a tripod works well. An app helps mainly if your phone lacks a manual mode or RAW capture.
How long should the exposure be for northern lights photos?
For a bright, fast-moving aurora, roughly 3–7 seconds keeps the rays sharp. For a faint, slow glow, 10–25 seconds collects more light. Phones in Night mode choose a time automatically, often longer on a tripod.
Sources
- Apple – Take Night mode photos with your iPhone camera
- Apple – Use Night mode on your iPhone
- Google – Take photos in low light or at night on your Pixel phone
- Dave Morrow Photography – Northern lights photography guide
- fr33water (Frankie Spontelli) – How to capture the northern lights
- National Park Service – Northern lights, Voyageurs National Park
Log in to comment
No comments yet. Be the first.